hello@audit9.com
Agentforce Grid enables you to build structured workflows using AI agents. Each column builds upon the previous one, using either data from earlier steps or an AI-powered action to progress the workflow. Instead of working with isolated AI interactions, Grid enables you to build structured workflows where each step builds upon the output of the previous one.
Salesforce provides detailed product documentation, but in this post we'll explore what Agentforce Grid is, when to use it for testing, and how to configure your first grid.
Agentforce Grid provides an environment for experimenting with AI-powered workflows before incorporating them into production processes. Its spreadsheet-style interface makes it easy to test multiple scenarios, inspect the output of each step, and refine prompts without impacting existing automations.
For example, you can use Agentforce Grid to:
By enabling rapid experimentation and iteration, Agentforce Grid helps you build more reliable AI solutions while reducing the risk of introducing untested workflows into production.
Before creating your first Agentforce Grid, you'll need to enable the required permissions.
For more detail on these prerequisites, refer to the official Salesforce documentation.
To create an Agentforce Grid:
After the grid has been created, you'll see the main design canvas, where you can begin adding columns and configuring your workflow.
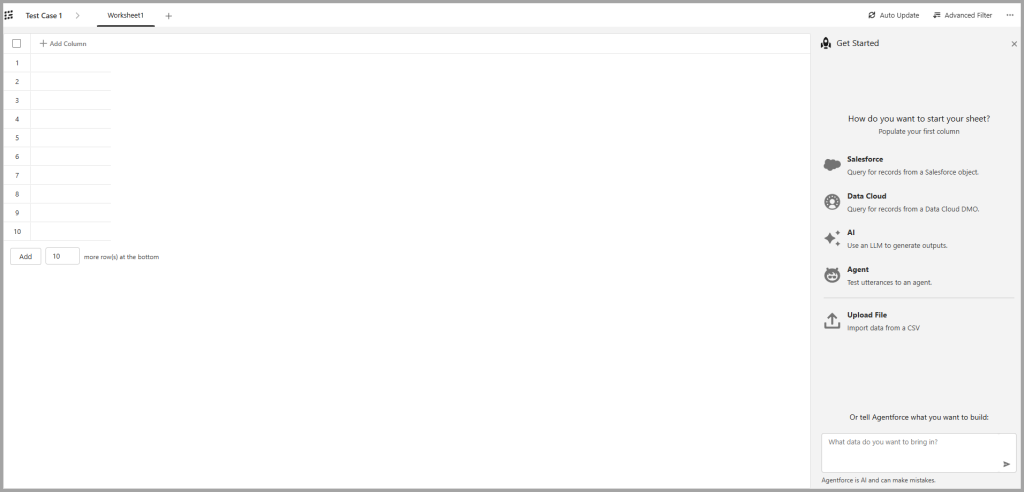
On the right-hand side of the designer, you'll find five options for creating the first column of your grid:
Choose the option that best matches the starting point for your workflow. Each subsequent column can build upon the output of the previous one, allowing you to combine data retrieval, AI reasoning, and business actions into a single workflow.
If you're unsure where to begin, Agentforce can also assist with creating your grid by generating a starting workflow based on your requirements. For more information, refer to the Salesforce documentation on building Agentforce Grids.
When creating a grid worksheet, you can see the 'Credit Cost'. This refers to the Usage Based Pricing model where actions performed by Agentforce consume Flex Credits for the actions configured within the grid.
Agentforce uses Salesforce's usage-based pricing model, where AI-powered actions consume Flex Credits. Monitoring the Credit Cost helps you understand the potential usage of your workflow before it is executed. For more information about Flex Credits and usage-based pricing, see the Salesforce documentation.
Agentforce Grid offers a practical way to design, test, and refine AI-powered workflows in Salesforce. By combining Salesforce data, Data Cloud, AI capabilities, and Agentforce agents within a single visual interface, it becomes much easier to experiment with ideas before incorporating them into production solutions.