hello@audit9.com
The Agentforce Testing Centre (Beta) offers new testing features that replace the legacy testing approach.
In this post, we’ll explore the latest enhancements to Agentforce Testing Center (Beta), including custom evaluation criteria, inline editing, AI output visibility, and new ways to monitor agent quality over time.
Note: Salesforce provides the following statement 'Note Agentforce Testing Center in Agentforce Studio is a pilot or beta service that is subject to the Beta Services Terms at Agreements - Salesforce.com or a written Unified Pilot Agreement if executed by Customer, and the Non-GA Credit Consumption, Non-GA Gen AI, and the Non-GA Open AI LLM Provider terms in the Product Terms Directory. Use of this pilot or beta service is at the Customer's sole discretion.'
The new features available are:
Let's look at each one in turn, which you can access through the App Launcher and search for Agentforce studio. If there is not an option to select the Agentforce Studio, you will need to log a support case.
For Salesforce help regarding this feature, the following link provides further information.
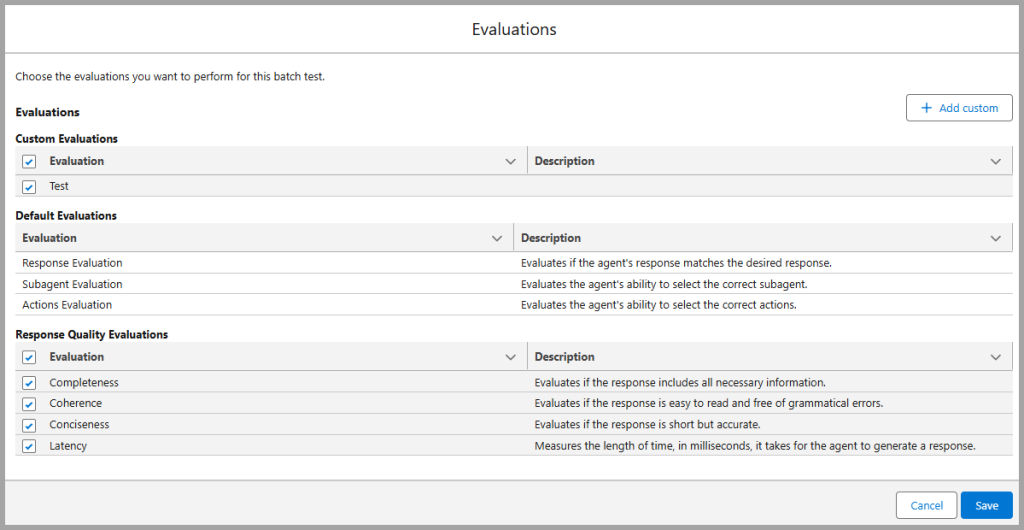
In summary, you can now define your own evaluations which enables you to ensure your AI outputs reflect your brand, meet quality standards and convey the correct point of view.
Default Evaluations include:
Response Quality Evaluation:
You can also setup your own custom Evaluation. Here's how it works:
For Salesforce help regarding this feature, the following link provides further information.
Previously, if you wanted to make any edits to the test suites, you would need to download the csv file, edit and then re-upload. Now, you can make changes in real time using inline editing.
The following provides an example of how you can do this:

For Salesforce help regarding this feature, the following link provides further information.
One of the biggest challenges when testing AI agents is understanding how an output was generated. Agentforce Testing Center now provides visibility into both the agent inputs and outputs, making it easier to troubleshoot unexpected responses and validate behaviour.
The following provides an example of how to do this:
For Salesforce help regarding this feature, the following link provides further information.
You can compare the results of your tests over time, ensuring the AI agents are providing the same level of quality. This is a great way of ensuring the accuracy and quality of the tests being run. When a Test Suite is run, the Run History is provided by a link in a separate tab.
The following provides an example of how to do this:
Clicking on the link provides a summary of the Tests executed, the pass and fails and the reasons for the results. These can be used to compare with future test runs.

Within the Test Suite, you can select the dropdown, top right, and then clone the Test Suite.
The following provides links to further Salesforce resources that discuss how to create Test Cases and Test Suites in the Agentforce Testing Centre (Beta).
The latest enhancements to Agentforce Testing Center (Beta) provide Salesforce teams with more control, visibility, and flexibility when testing AI agents.
Features such as custom evaluation criteria, inline editing, and historical run comparisons make it significantly easier to validate AI behaviour and maintain response quality over time.
As Agentforce continues to evolve, these testing capabilities will become increasingly important for organisations looking to deploy reliable and scalable AI experiences within Salesforce.